In TORSH Talent, you can easily author your goals based on pre-designed Goal Templates assembled by Admins and Coaches within your system! Goal Templates are an efficient way to author and assign goals out without having to completely build a goal from scratch.
Contents:
I. How To Create a Goal Based on a Goal Template
II. How To Add Action Steps To a Goal
III. How To Add Resources To a Goal
IV. How To Add Evidence To a Goal
V. How To Add Reflections To a Goal
VI. How To Monitor the Activity Stream of a Goal
VII. How To Add Tags To a Goal
VIII. How To Modify a Goal's Settings
IX. How To Share a Goal with Others
X. How To Modify the Progress of a Goal
X. How To Export a Goal as a PDF
How To Create a Goal Based on a Goal Template
To quickly create a goal for other users using a pre-built goal template, first navigate to the 'New' button in the top, right-hand corner of your Talent webpage and select 'New Quick Goal.'

You can also do so by first navigating to 'Coaching Corner' in your top navigation bar. From there, click 'Goals.'

In this route, you will then be brought to the Goals Hub page. The experience of this page will vary depending on your role type. To quickly create a new goal, click the 'Create New Goal' button.

When you go to create a goal, a new pop-up will load, and you will be given various options for authoring your goal. To author a goal based on a Goal Template, choose:
- View Goal Templates - Create a goal based on a selection of pre-built Goal Templates available within your system.

On the pop-up that appears, click the dropdown to select a goal template. Once you have selected your template, a preview of the template will appear listing all of its details and action steps and pre-assigned tags.
Scroll down the Details page and click on the 'Use This Template' button to begin authoring your goal based on this goal template.

You will then be brought to your goal's 'Details' tab to add even more materials to the goal - such as Action Steps, Resources, and Tags via the various other tabs presented at the top of the goal's webpage.

How To Add Action Steps To a Goal
Once you have successfully authored your goal, click on its 'Action Steps' tab in its navigation bar.

From here, click the 'Add Action Step' button in the top, right-hand corner. An action step window will appear. You can then give your action step a Title and a Description. Next, give your action step a Due Date. You can also Assign To specific users for whom the goal is shared with (In most cases, an action step is typically assigned to the user who whom the overall goal is assigned for).

You can also add attachments to each of your action steps! NOTE: Action Steps can only have attachments added after the action step has been saved. Simply scroll down the Action Steps page, find your action step and click on its '...' icon. Then select 'Edit Action Step' from the dropdown. Next, click on the 'Add Attachments' button. From there, select the specific artifacts you would like to include when a participant of the goal views this action step.

Click 'Save' to save your action step, or click 'Save & Add Another' if you wish to add another action step.

You can even add Sub Steps to each action step in your goal! When authoring an action step, scroll down and click 'Add Sub-Step.'

Much like a regular action step, you can give a Sub Step a Title and a Description. Next, give your sub-step a Due Date. You can also Assign To specific users for whom the goal is shared with. Click 'Save' to save the sub-step within the action step.

By default, your action steps will be arrange from most recently authored to least recently authored. Feel free to reorder their placement by drag-and-dropping them into whatever order you choose.

How To Add Resources To a Goal
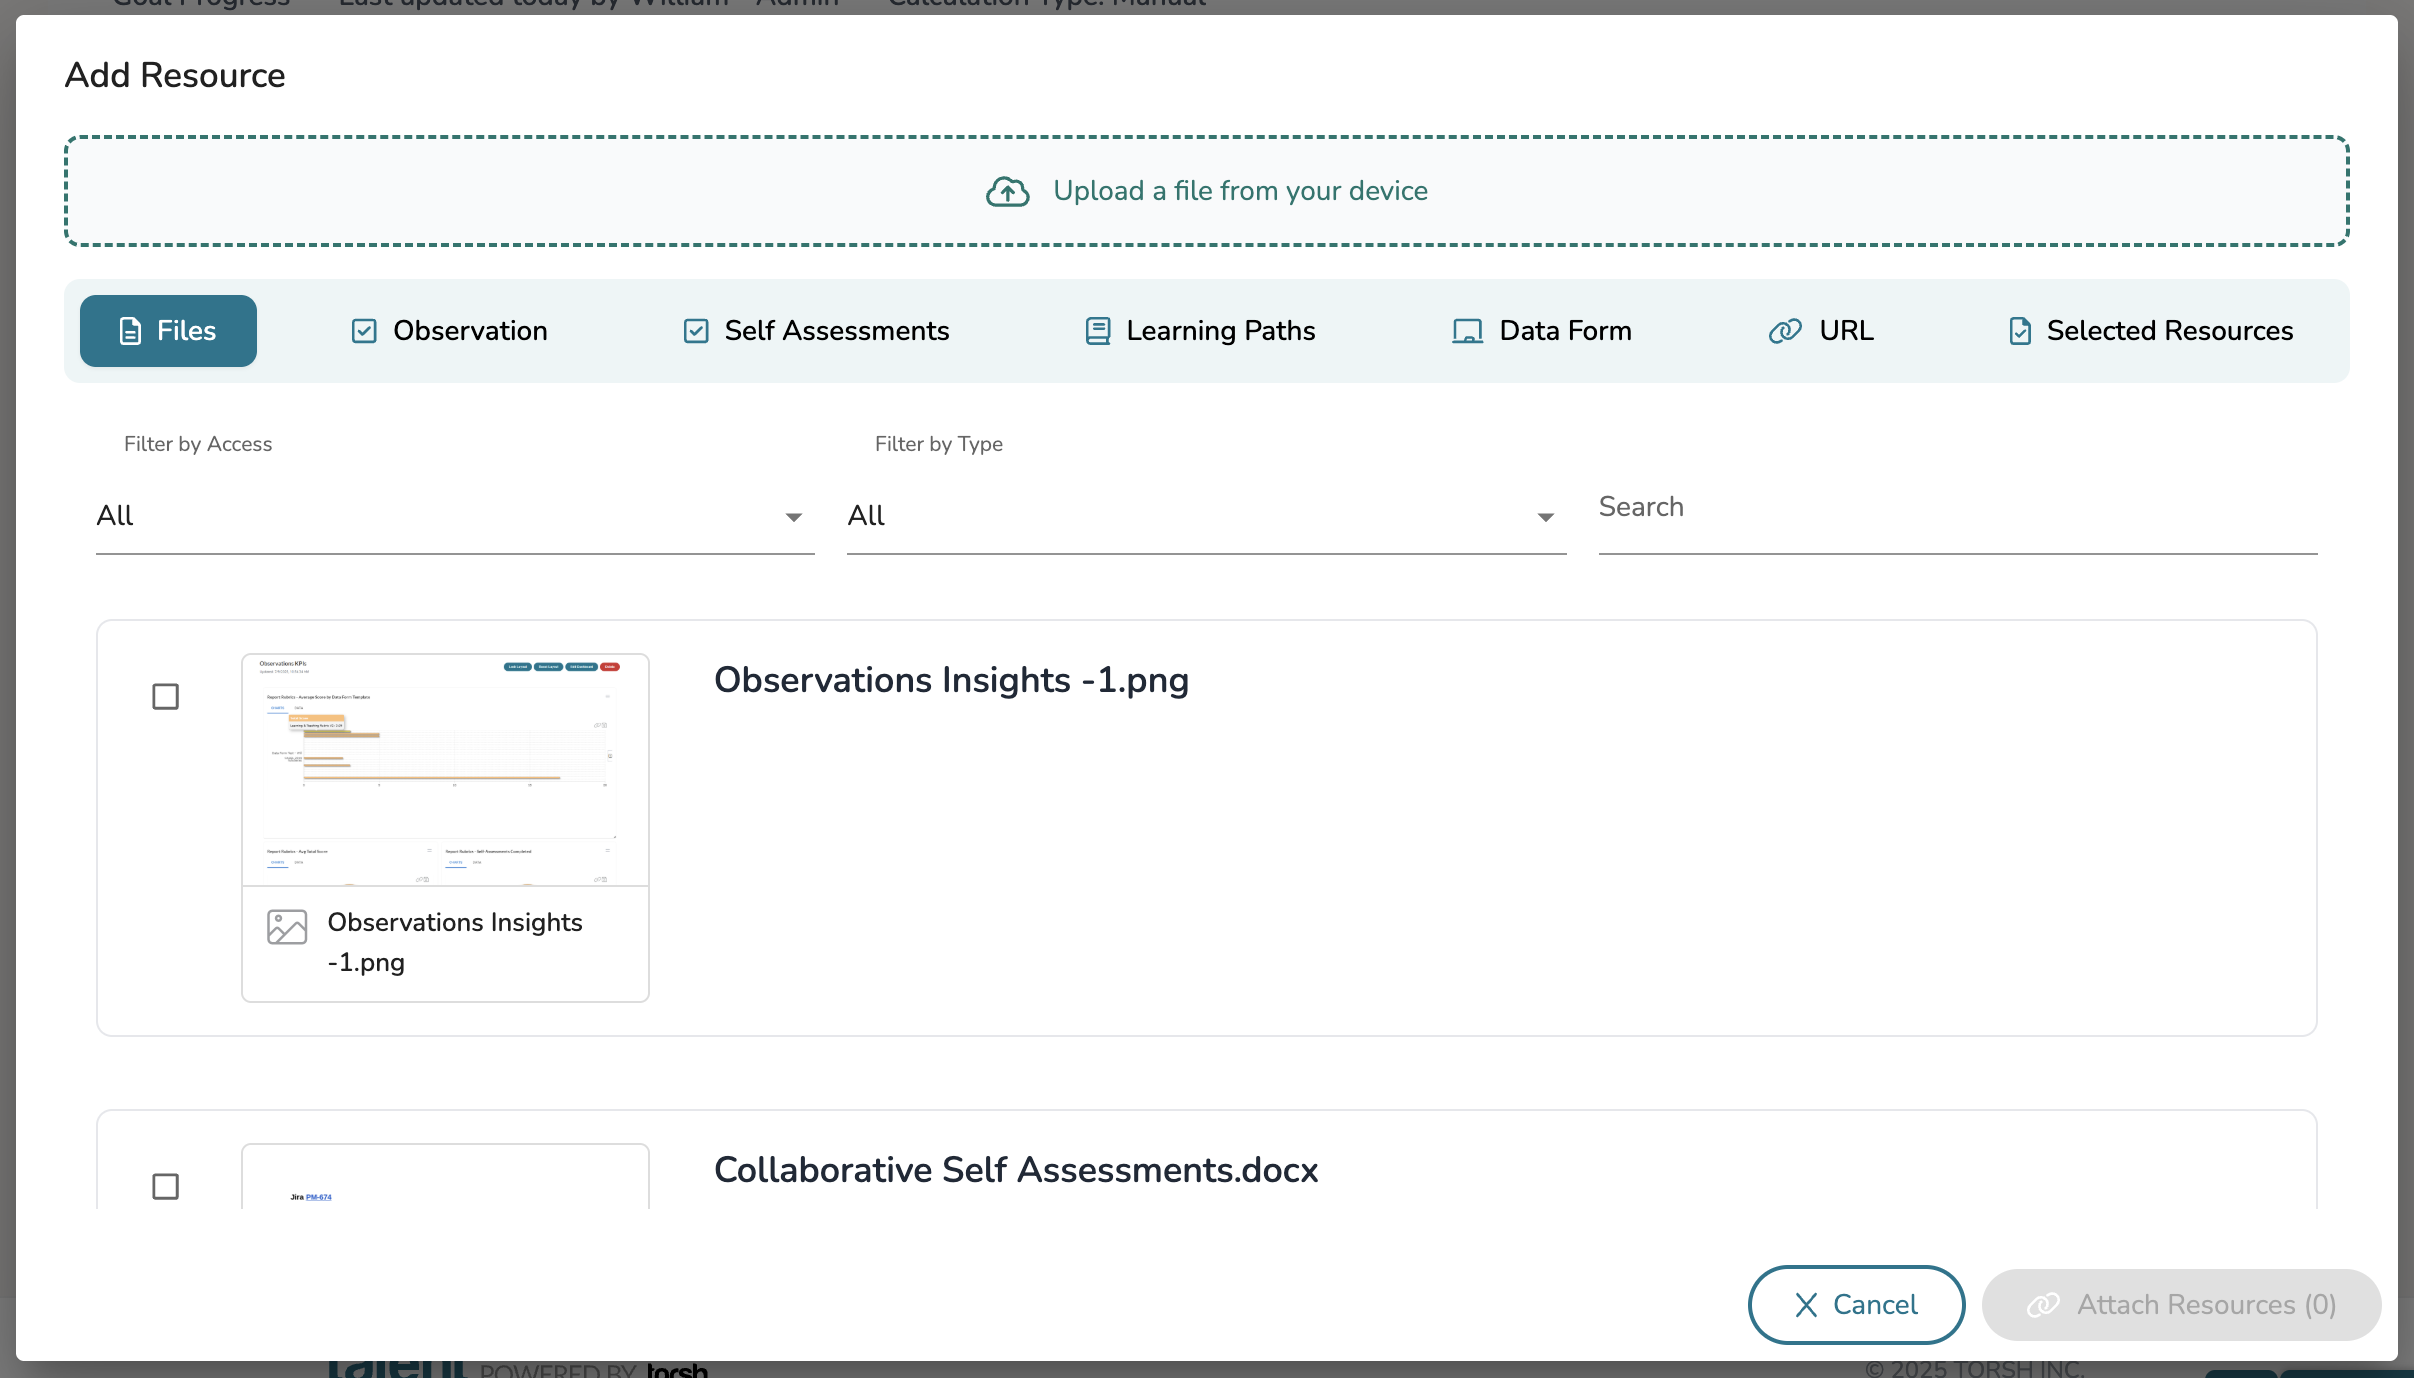
To add resource documentation to a goal, click on the 'Resources' tab and then click 'Add Resource.'
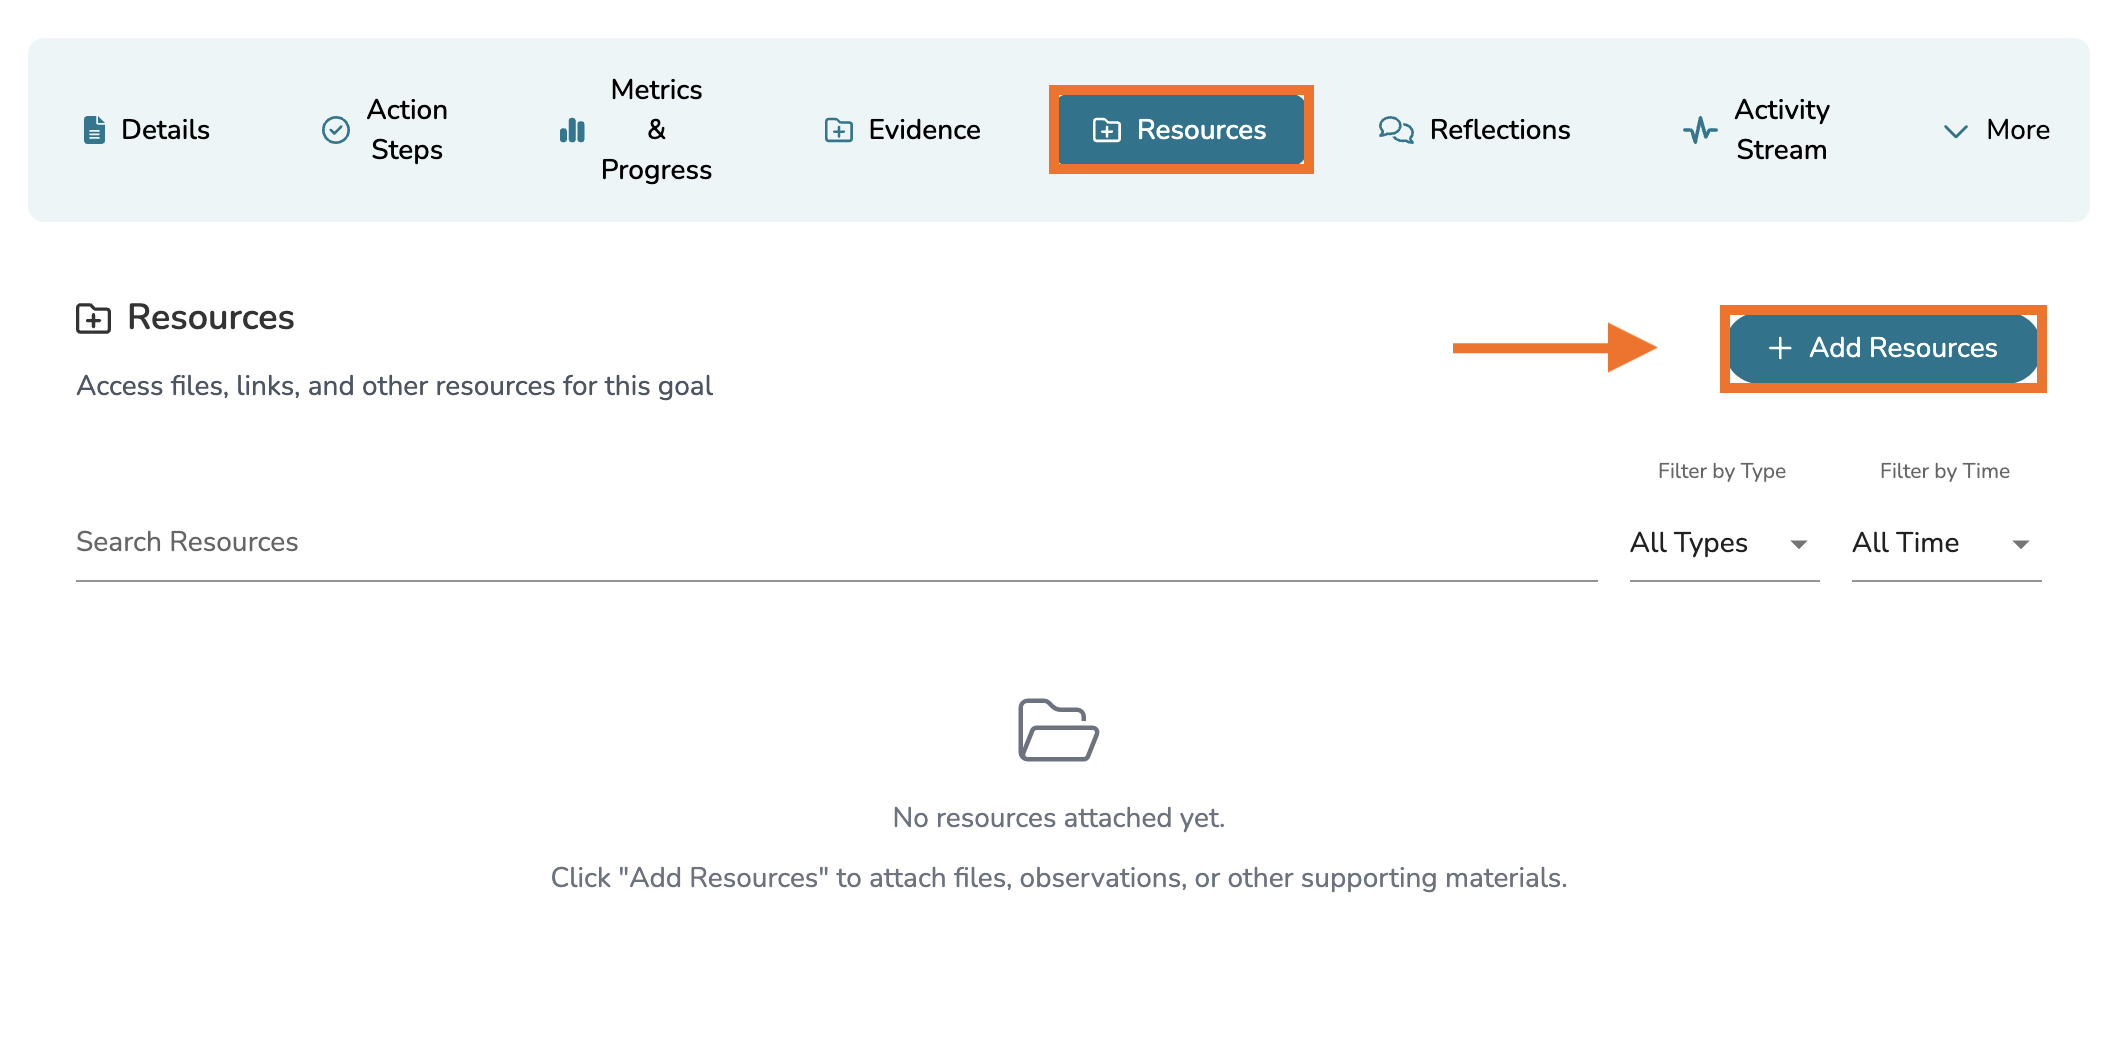
From there you can choose to include either specific artifacts uploaded and created or upload new artifacts as a resource to the goal.
How To Add Evidence To a Goal
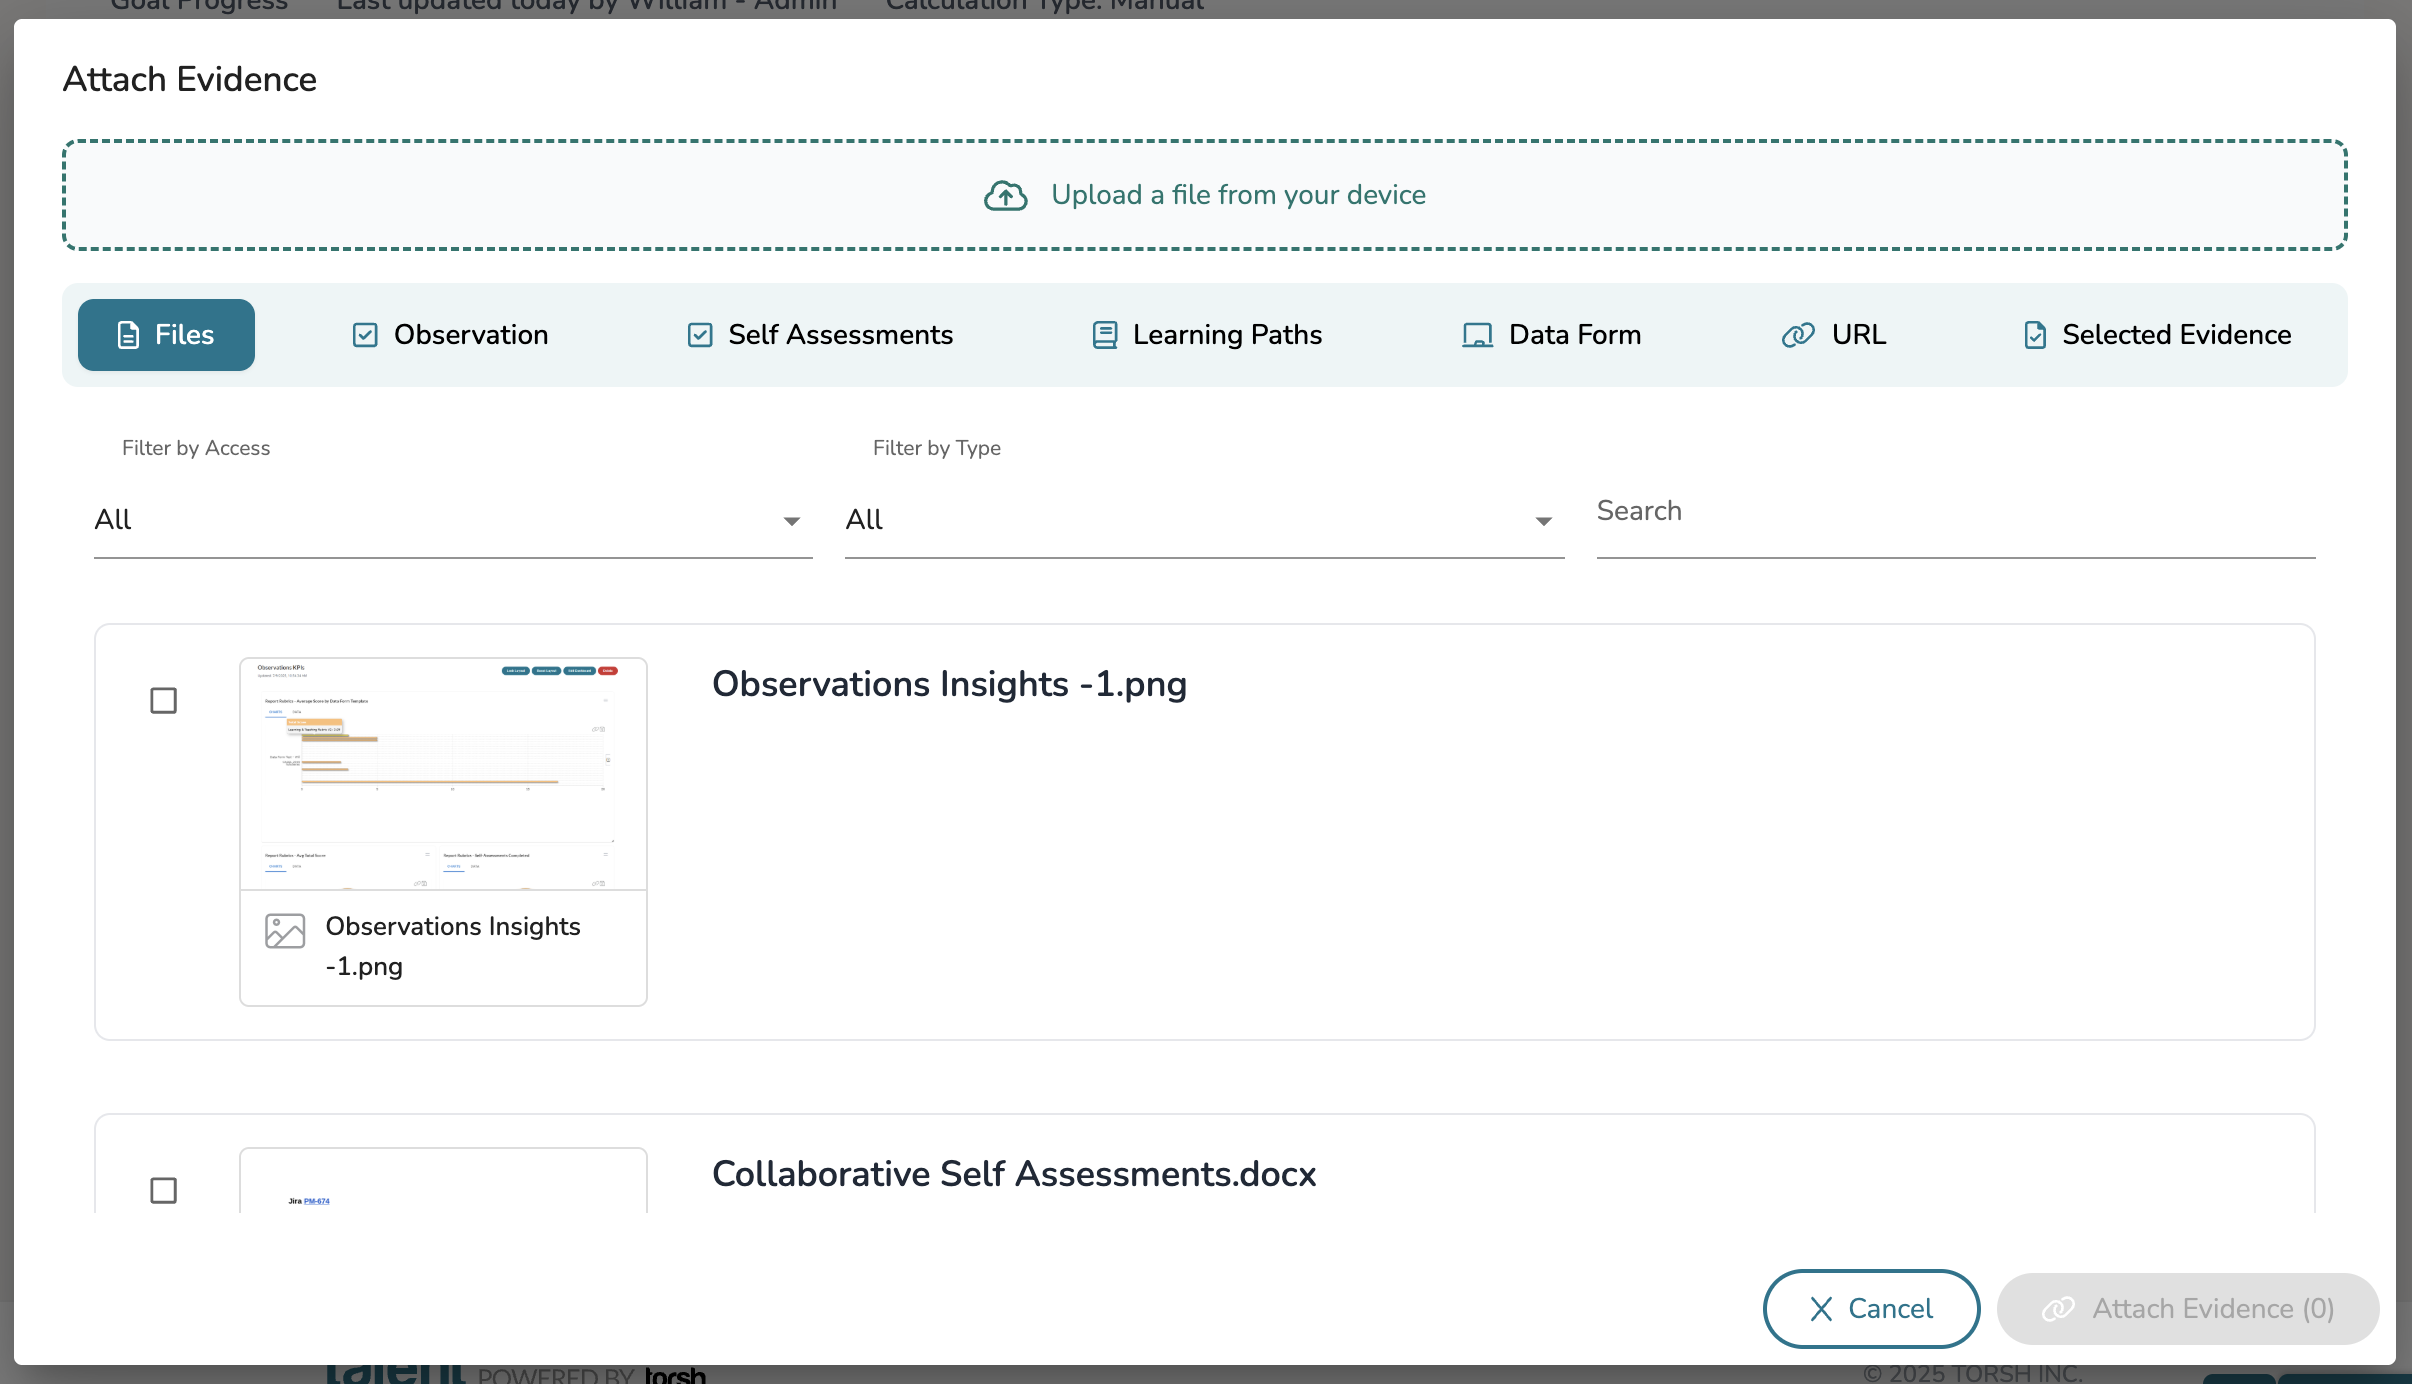
When marking progress in a goal (not necessarily for the authoring stage), you or the user(s) assigned to the goal can add Evidence, artifacts that prove their completion of specific action steps or metrics. When attaching evidence pieces to a goal, click on the 'Evidence' tab and then click 'Add Evidence.'

From there you can choose to include either specific artifacts uploaded and created or upload new artifacts as a piece of evidence to the goal.
How To Add Reflections To a Goal
You can add comments to your goals via the 'Reflections' tab! Here you and any other users with access to the goal can post comments and respond to each other accordingly.
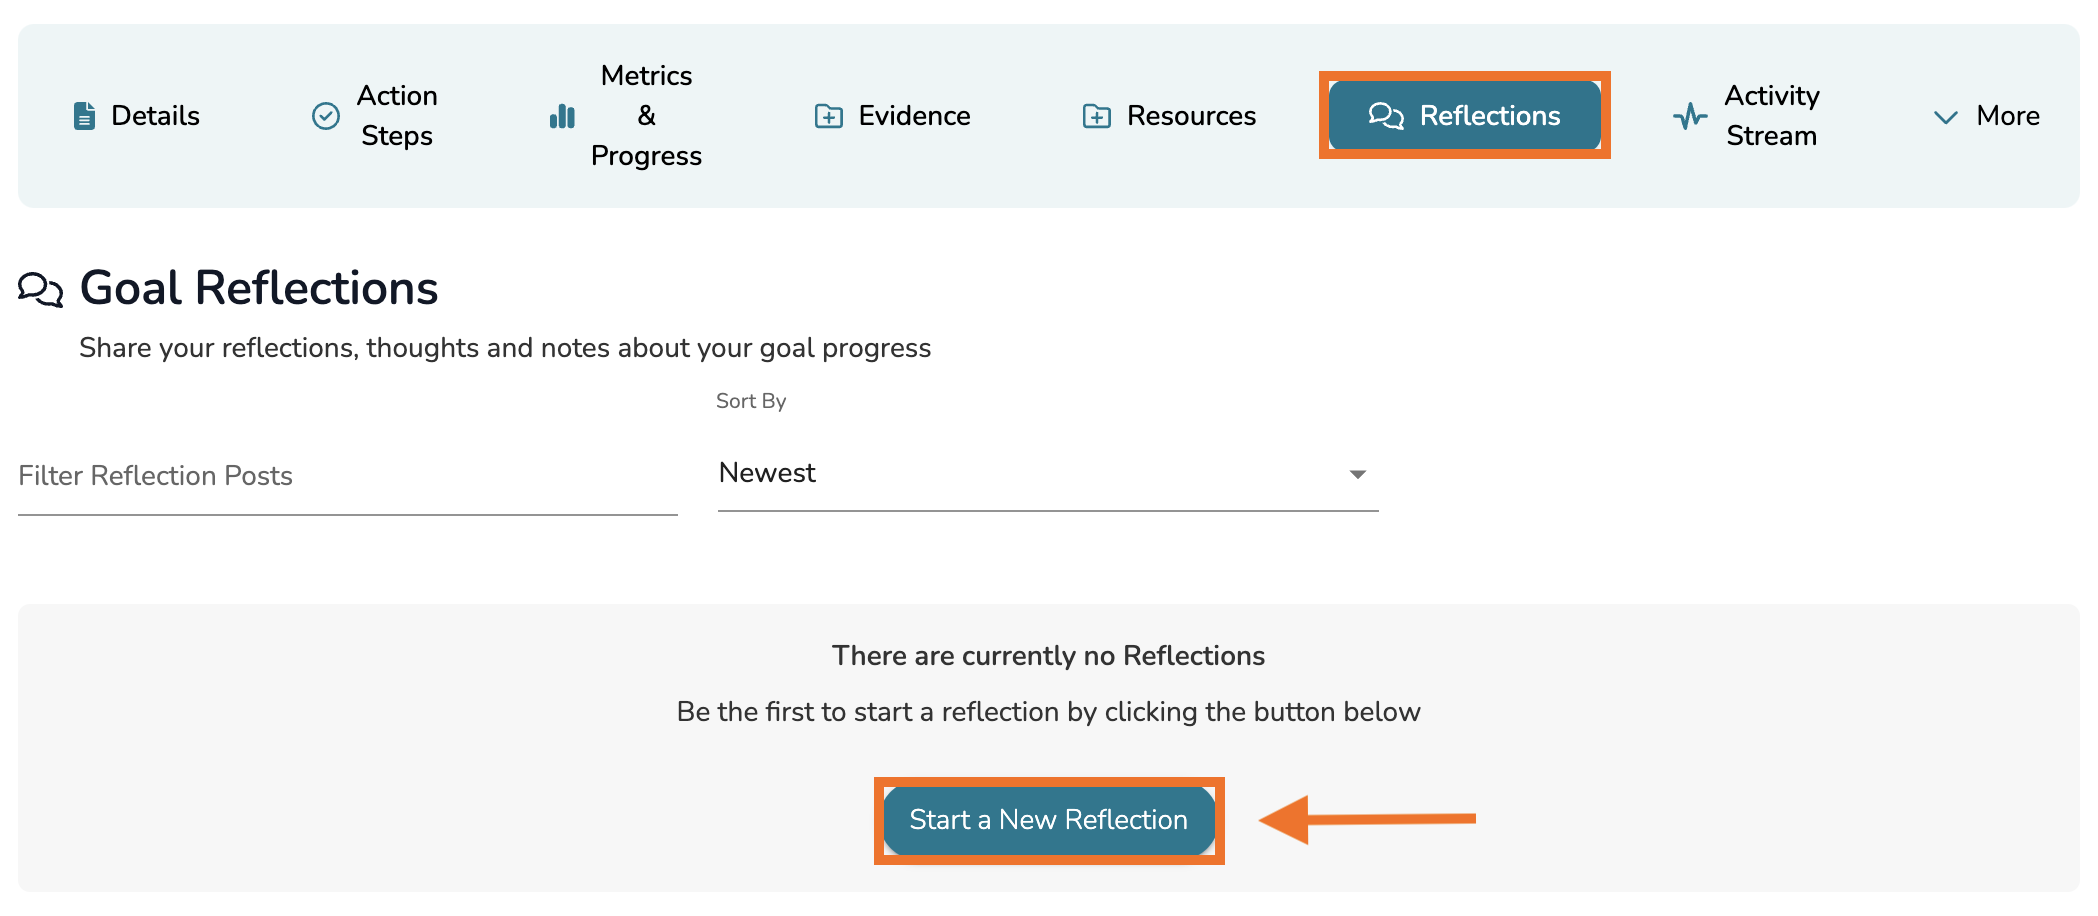
Click 'Start a New Reflection' to get started and enter your text in a comment post. Click 'Post' to post your comment to the goal.
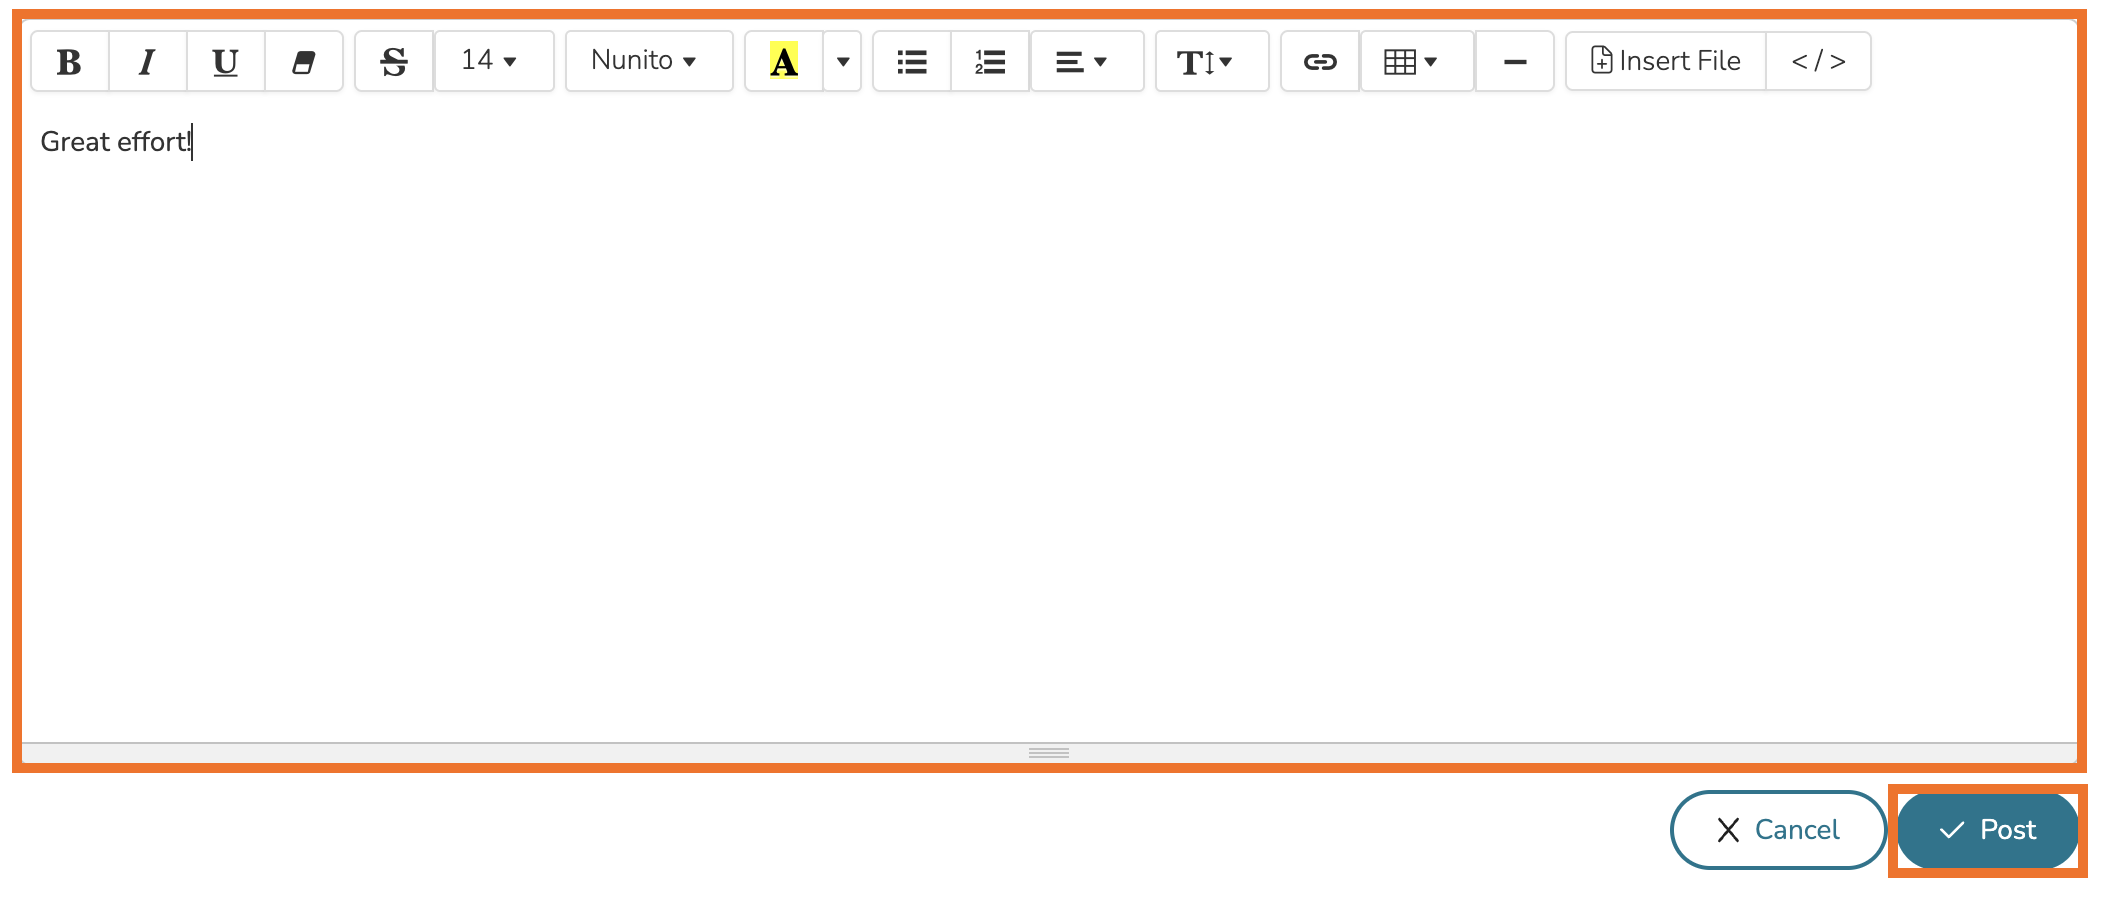
From here, your comment will appear in a comment thread. Others who can view this goal can reply as needed or post new comments in the Reflections tab.

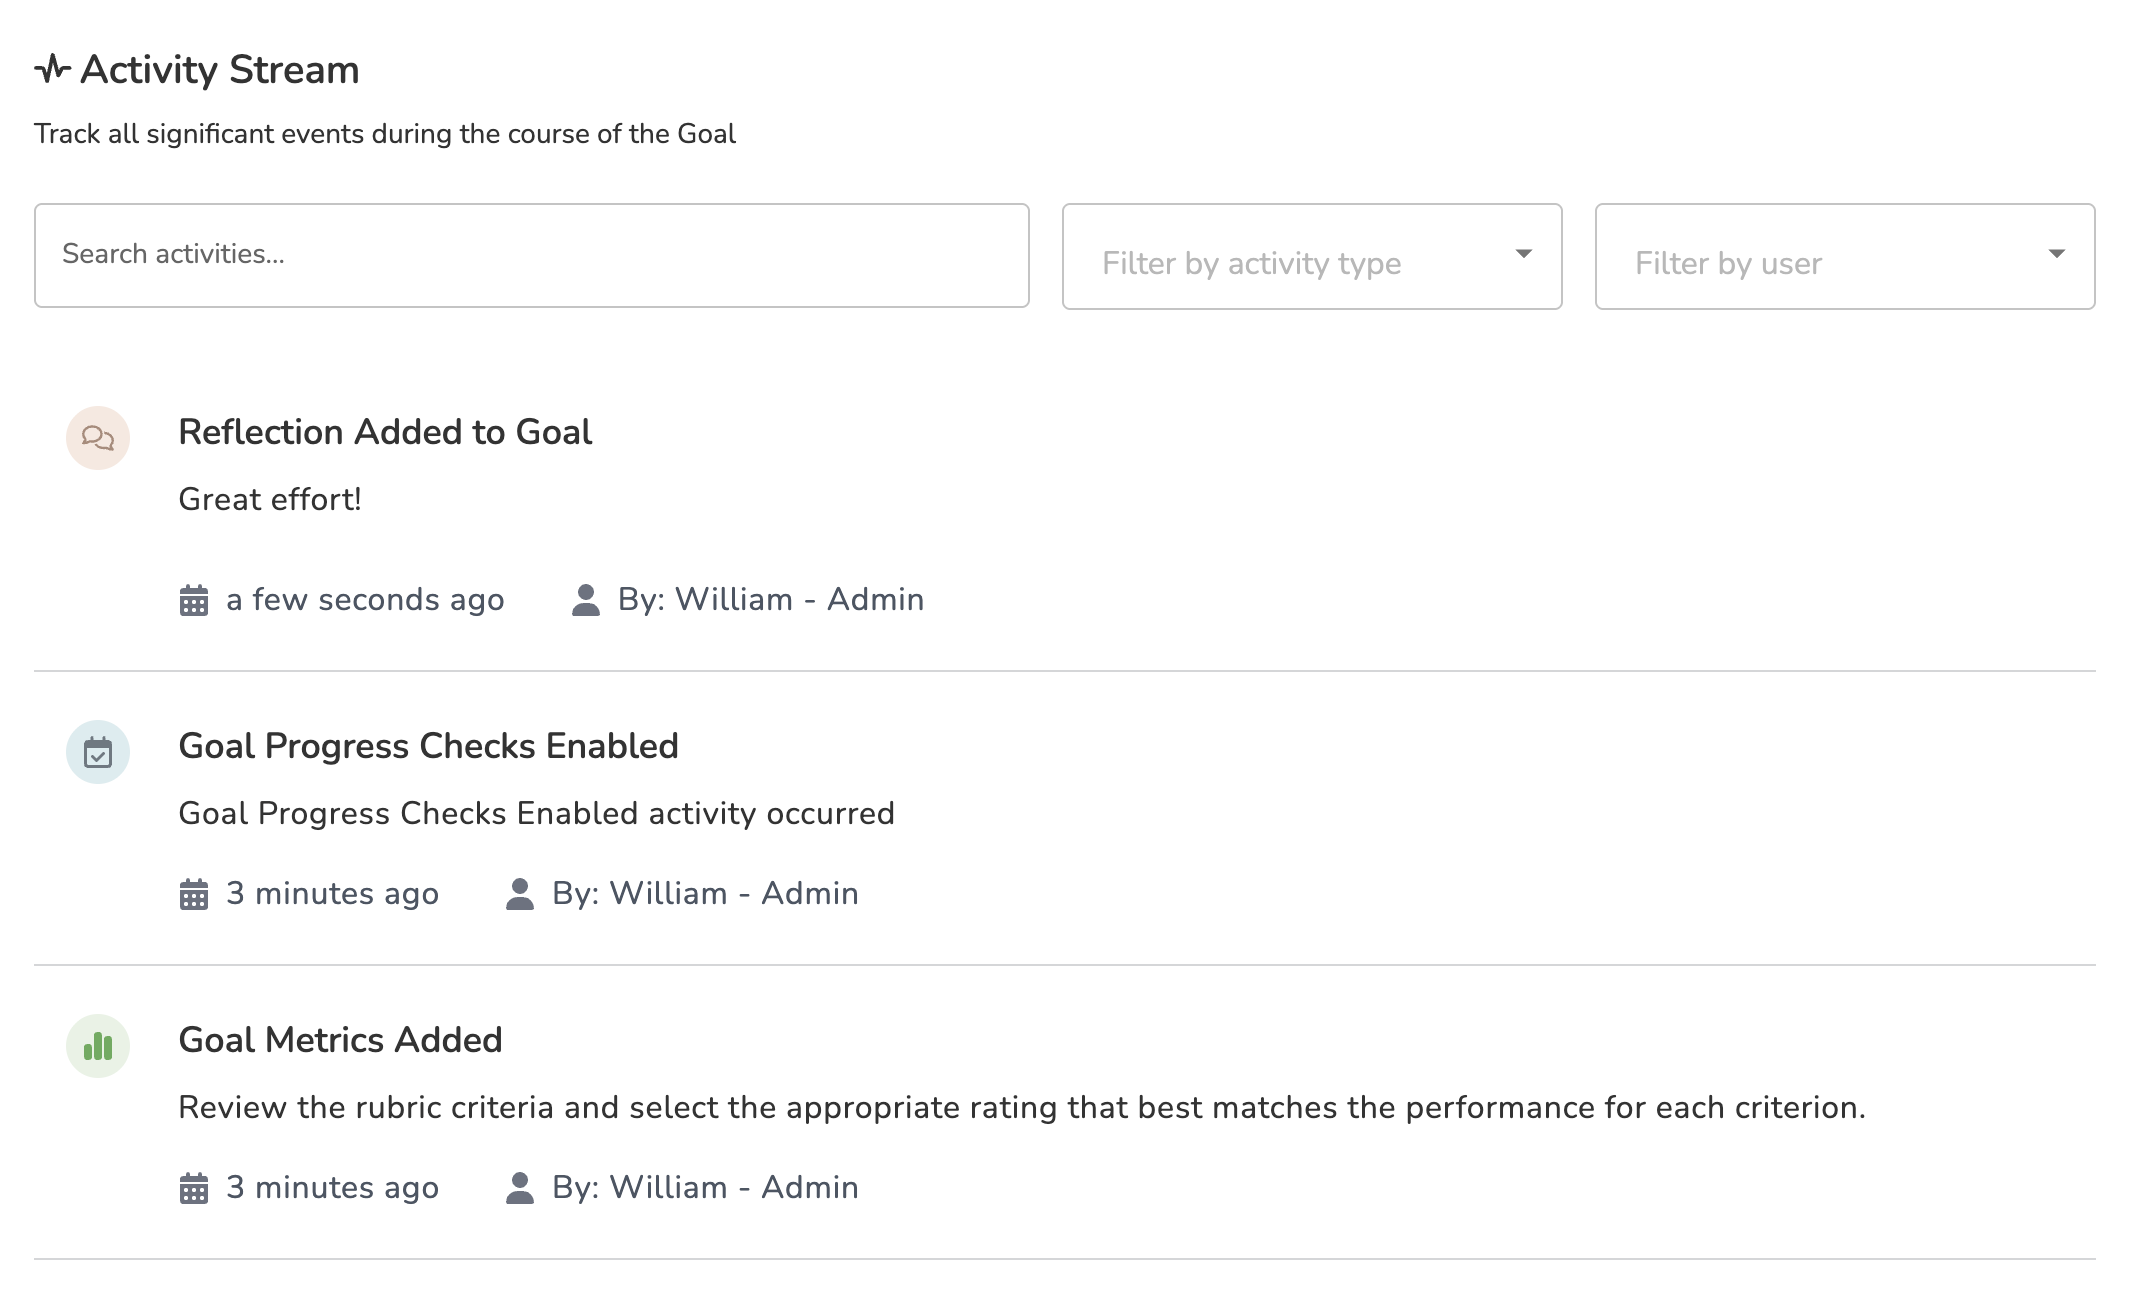
How To Monitor the Activity Stream of a Goal
Any and all modifications made to a goal - including action step additions, resource/evidence attachments, progress updates, and notes - will be logged in its Activity Stream tab. Here you can scroll through and find a list of each specific action made to the goal, when the action was performed, and by whom.
You can filter this page based on specific Keywords, Activity Types, and the Users who performed the activity.
How To Add Tags To a Goal
You can tag your goals with Focus Tags and/or Rubric Tags.
- Focus Tags - General tags created and managed by the Admins of your system. These are great for tagging general values or codes for the goal.
- Rubric Tags - Tags based on the specific domains and dimensions and criteria of active Rubric Templates in your system. These are great for tagging competency based on specific coaching practices.
Adding Focus Tags
To add a Focus Tag to a goal, click on the 'More' tab and then select 'Focus Tags' from the dropdown menu.

Click on the 'Focus Tags' dropdown and select from the available tags in your system. Your selection will automatically save to the goal.

Adding Rubric Tags
To add a Rubric Tag to a goal, click on the 'More' tab and then select 'Rubric Tags' from the dropdown menu.

Click on the 'Add Rubric Tags' button.

In the pop-up that appears, select a specific Rubric Template framework. Then display the criteria using the dropdown arrows provided for each domain and dimension of the framework. To add a specific tag, click on the available checkbox next to each criteria.

Click on the 'X' icon in the top, right-hand corner once you are done. Your selections will automatically save to the goal.

How To Modify a Goal's Settings
When authoring a goal, you can modify essential settings that help determine how Progress is calculated and if you would like for this goal to be the basis for a new Goal Template.
To open a goal's settings, click on the goal's 'More' tab and select 'Settings' from the dropdown menu.

Progress Settings
If your system has purchased the Goal Metrics add-on, then from the Settings page of a goal, you can choose to have progress calculated based on one of three different progress types (Otherwise, you will only have the option to manually modify goal progress):
- Manual - Progress is updated manually by users with appropriate permissions. Those users can update their goal progress manually by adjusting the progress bar slider.
- Automatic - Action Step Based - Progress is automatically calculated based on completed action steps. The progress bar for a goal will move forward according to the ratio of completed action steps
- Automatic - Metric Based - Progress is calculated automatically based on metric targets and progress checks. The progress bar for a goal will move forward according to the average progress of its individual metrics.

Saving as a Goal Template
Further down, you can also save your authored goal as a Goal Template. To do so, click 'Save as Template.' Moving forward, the users in your system can use this template as the basis to author one of their own goals.

How to Share a Goal with Others
After you have created a goal, you can then share the goal with other users either to assign the goal to multiple users at once or to have other users track your authored goal's completion over time. This allows for a more collaborative experience with goals! To learn more about Goal Permissions, read this article here .
NOTE: By default, the user you assign the goal for is given View Permissions to that goal, unless they are an Admin or a Coach.
To share your goal with other users aside from the user it assigned for, first create the goal. Then navigate out of the goal authoring, select Coaching Corner in the top navigation bar, and then click on 'Goals.'

On your Goals hub page, navigate to the 'Goals For Others' tab.

On the Goals For Others tab, scroll down to the 'Goals For Others' section. Find the goal you just authored and click on its 'three-dot' icon and select 'Share' from the dropdown menu.

In the Share pop-up, select the individuals for whom you would like to share this goal with. Then click 'Add to Table.' Once they have been added to the table, you can modify their Permission Level in the table below.

To finalize your share, scroll down the pop-up and click 'Share and Notify.' This will share your goal with the users you selected and added to the table.

How To Modify the Progress of a Goal
To modify the progress of the goal, it depends on your goal's established progress settings. By default, you will only have access to set a goal to by modified via Manual adjustment. You can follow the steps below.
Otherwise, if your system has purchased our Goal Metrics add-on, and the progress of the goal is set to Automatic - Action Steps or Automatic - Metrics, then the progress of the goal will adjust accordingly, based either on the amount of Action Steps completed or the Metrics met that you have in place for the goal.
Manual Progress Adjustment
If your goal's Settings page has its progress set to Manual, then you can open the goal and click on the 'pencil icon' in the top, right-hand corner of the goal's green progress bar.

In the pop-up that appears, click and drag the progress marker to your desired percentage placement along the progress bar. You can even leave notes for the specific adjustment, providing reasoning for the change in progress. Lastly, click the 'Update Progress' button to save your changes.

How To Export a Goal as a PDF
For each goal you have access to, you can export the goal and its various pieces as a PDF document. To do so, open the goal by clicking on it. On the next page, click the 'Export As PDF' button in the top, right-hand corner.

In the next pop-up, you can select which parts of the goal you would like to have included in your PDF document. Click 'Export PDF' in the bottom right-hand corner once you have made your selection.

After a few seconds, the goal should generate in a new tab of your web browser as a downloadable PDF document!